This guide will show you step-by-step how to configure your iPhone or iPad network settings for proxies.
A proxy server is a powerful tool that sits between your device and the internet, allowing you to access websites and services anonymously. However, sometimes 1 deposit casino nz.com accessing certain content can be restricted based on your geographical location. This can be frustrating and limiting, but with the help of a proxy, you can bypass these geo-restrictions and access the content you want. In this guide, we'll show you step-by-step how to configure your iPhone or iPad network settings for proxies, so you can start browsing anonymously and accessing blocked content in no time.
You can configure your iPad or iPhone to use an HTTP proxy or SOCKS5 Proxy server and the process is the same for both of them. This guide will show you step-by-step how to configure your network settings for proxies.
Step 1: Get the Proxy IP and Port
To get your proxy address log in to your account and select the category of the proxy server you want to use.
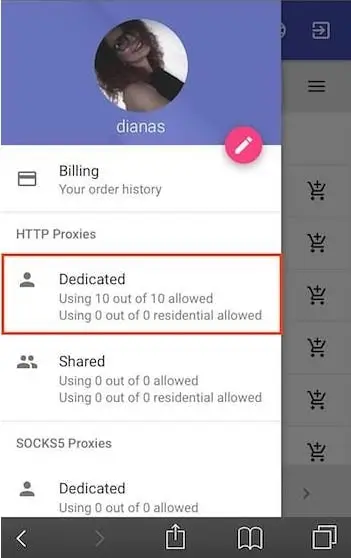
Accessing your Account: Tap on My Dedicated Proxies.
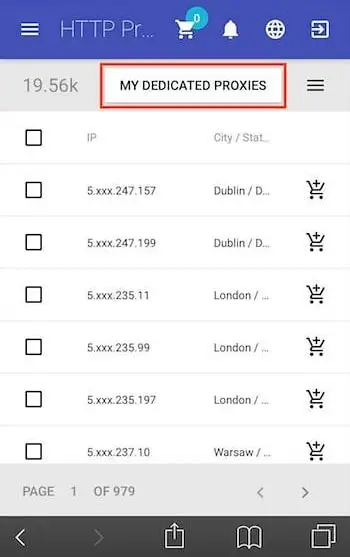
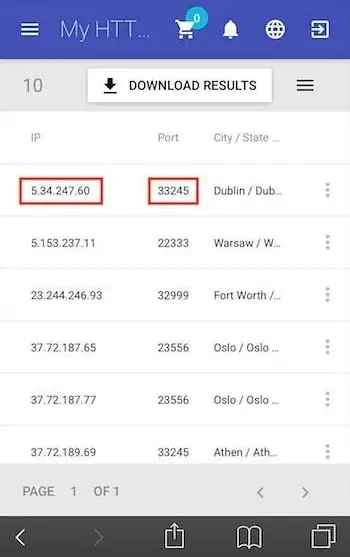
Choosing the Right Proxy Server - Choose the proxy you want to use and get the IP and port.
Step 2: Set the Authentication Method
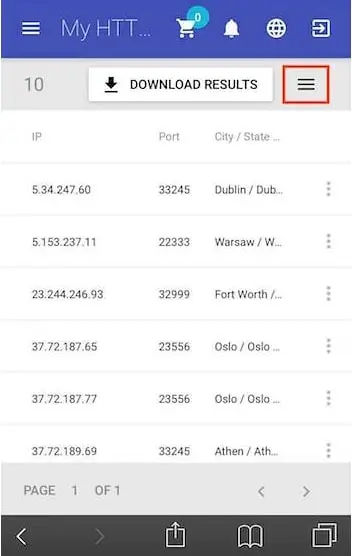
Authentication to the proxy server will be made through the username and password that you can find in your account.
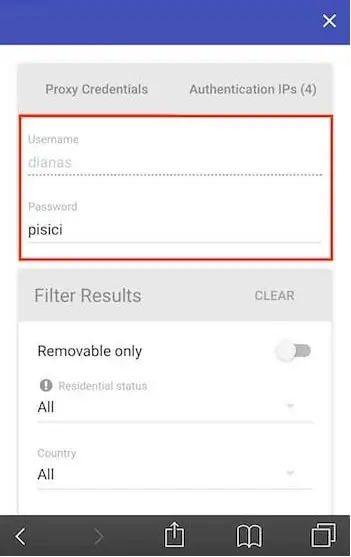
From the purchased proxies window, tap on the hamburger button in the top right corner.
Finding your Proxy Credentials.
In the Proxy Credentials tab, you will find the username and password that you'll use for authentication.
Step 3: Configure Your Network Settings
Configure your network settings on your iPhone/iPad
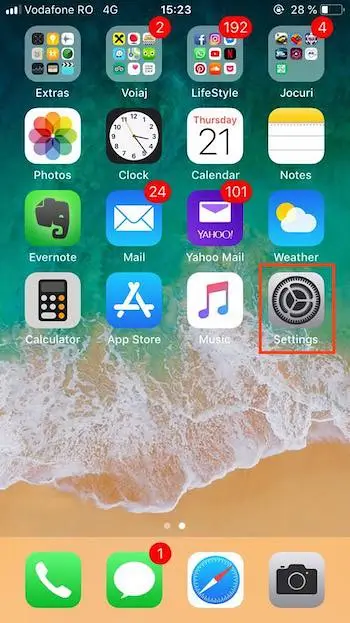
First, access the device's Settings.
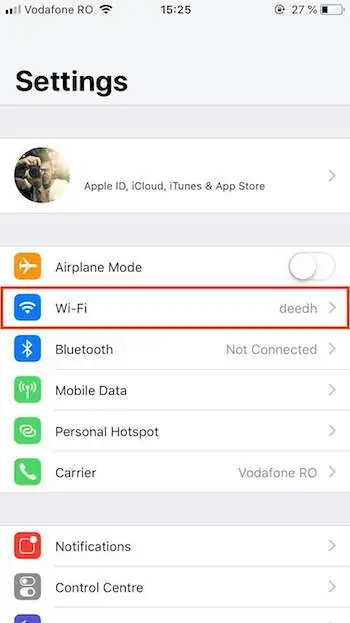
From the General Settings window, tap on the Wi-Fi settings category.
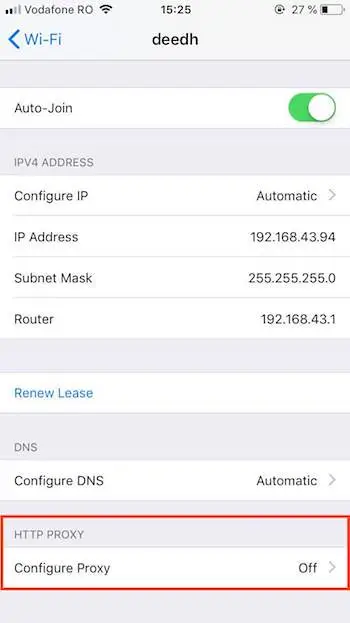
Tap on the Wi-Fi network you are connected to.
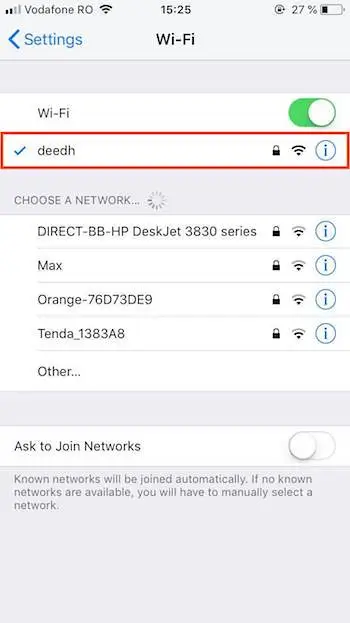
It'll display more settings for that specific network. At the bottom of the screen, you can see the HTTP Proxy section. Tap on Configure Proxy.
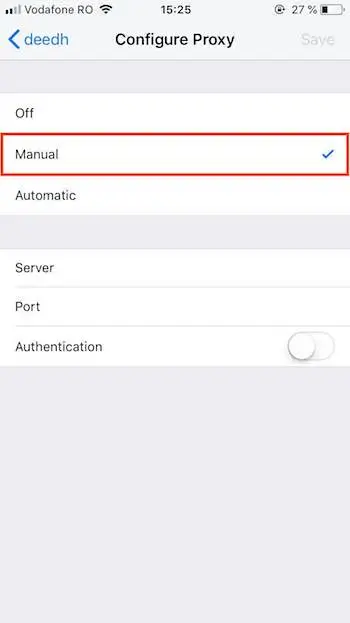
Tap on Manual to activate the manual proxy configuration.
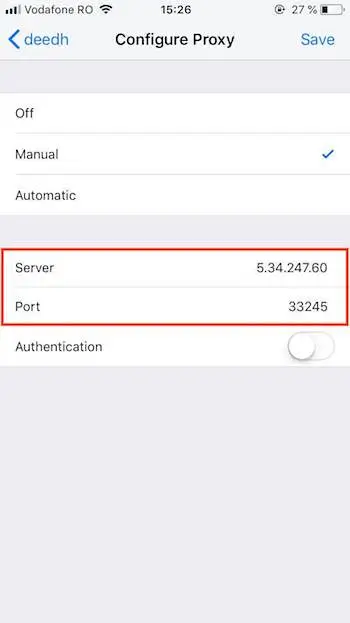
Fill in your proxy IP and port in the dedicated fields.
Switch ON the Authentication button and enter your authentication credentials (the Proxy Credentials from your account).
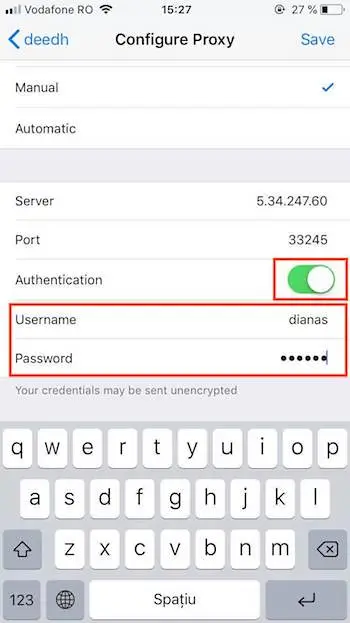
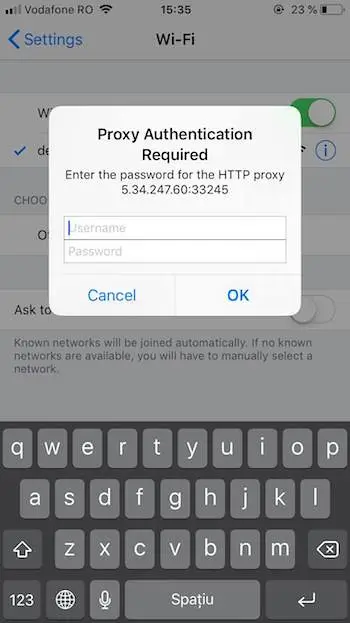
Your device is ready to use the proxy server. When you'll first access a web page you'll be asked to provide the authentication credentials.

In conclusion, configuring proxy servers on your iPhone or iPad can help you bypass geographical restrictions and access blocked content. By following the steps outlined in this guide, you can easily set up and configure your network settings for a secure and unrestricted browsing experience. Remember to always check the laws and regulations of your country before attempting to bypass geographical restrictions, and choose a reputable provider for your proxy services. Additionally, it is important to keep in mind that using a proxy server may affect your internet speed and that the settings are only applied to the specific Wi-Fi network you are currently connected to. Therefore, it's important to periodically check for the proxy server's IP address and port to make sure that it is still active and to repeat the process if necessary.
Related tutorials: