A step-by-step guide with screenshots to guide you through the required proxy configuration on each browser.
To use the private proxies you purchased you need to configure the browser of your choice accordingly. Here you have a step-by-step guide with screenshots to guide you through the required configuration on each browser.
Get your private proxy IP and port.
First, log in to your account and go to your purchased private proxies .
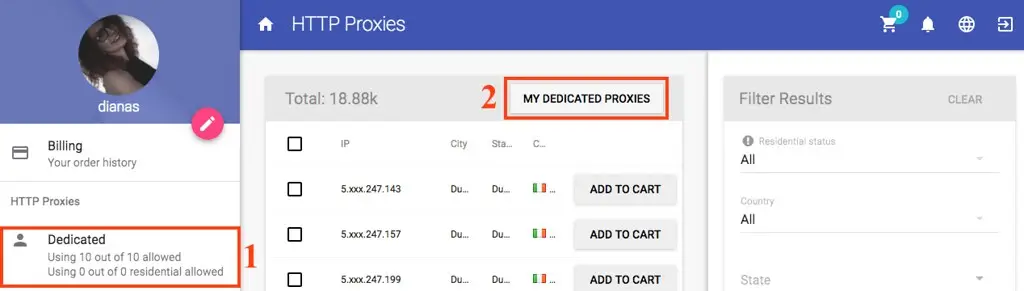
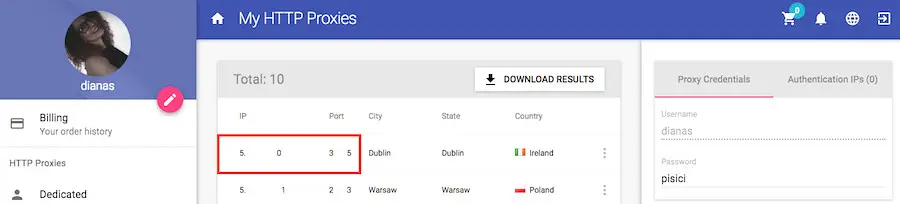
Get the IP and Port of the proxy server you want to use. These are the credentials you'll be adding to the browser's proxy settings.
Choose your authentication method
To connect to the private proxy server, you need to choose one of the two authentication methods: By using a username and password or through IP Authentication.
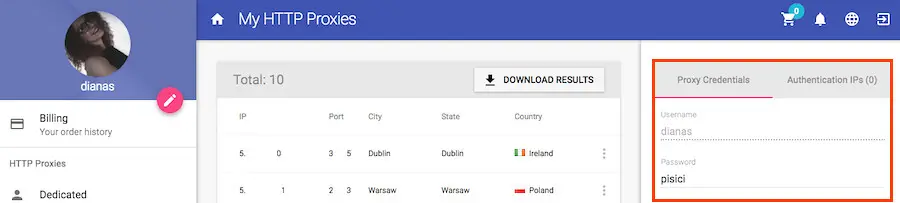
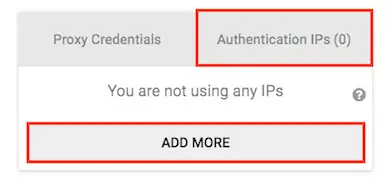
On the right column, you can see the Proxy Credentials tab used for the user password authentication and the Authentication IPs tab used for the IP authentication.

- Username & password authentication
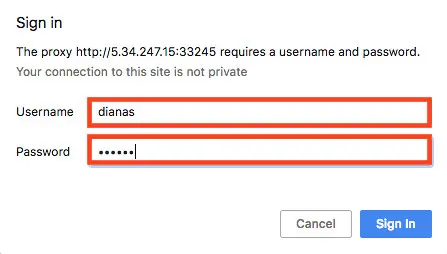
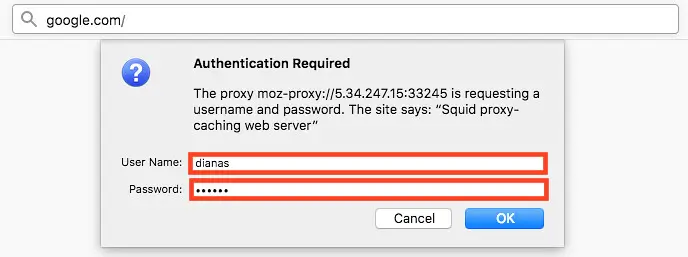
If you choose to authenticate by using a username and password, you'll be asked to provide the credentials after you configure the browser to use the proxy server. A pop-up window will open when you'll access a web page (you'll find a screenshot of this request in the following guides for each browser).
You can find the username and password in your account under the Proxy Credentials tab.
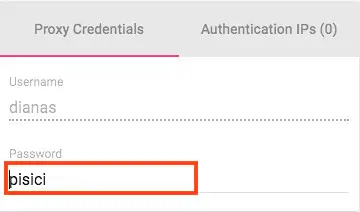
The username is your account's username and it can't be changed. You can change the password by clicking on the password field and typing in the desired password. The change will take place automatically.
*This password is different from the password you use to log into your account.
- IP authentication
Through this method, the authentication to the proxy server will be made based on your IP without it requesting a user password.
To add your own IP to the IP manager access the Authentication IPs tab and click on Add More.
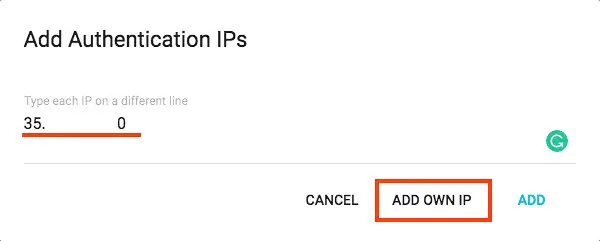
A new window will pop up. Click on Add own IP and your IP will be pulled automatically.
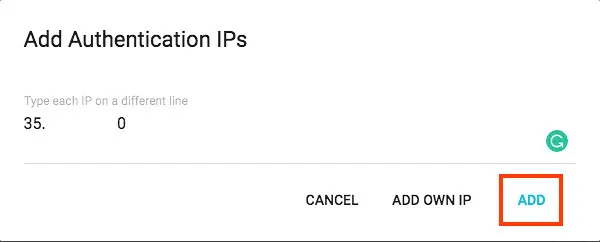
To save it, click on Add.
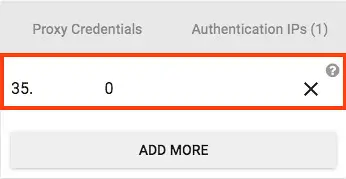
The IP will be shown in your account in the Authentication IPs tab. You can delete the IP by clicking on the X next to it.
Safari
To configure the private proxy in Safari, open up the browser and go to Preferences by clicking Safari in the menu bar. Or you can use the ⌘ keyboard shortcut.
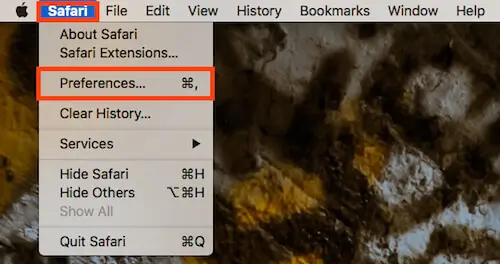
A window with the browser's settings will pop up. Go to the Advanced tab. At the bottom of the page, you'll see the option Proxies. Click on Change Settings…
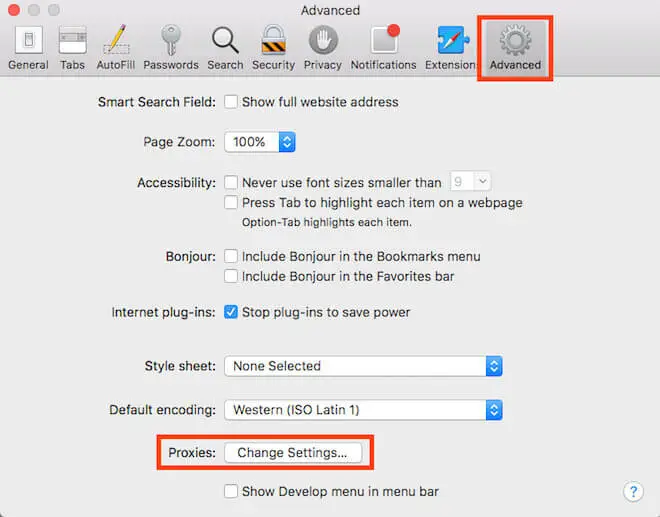
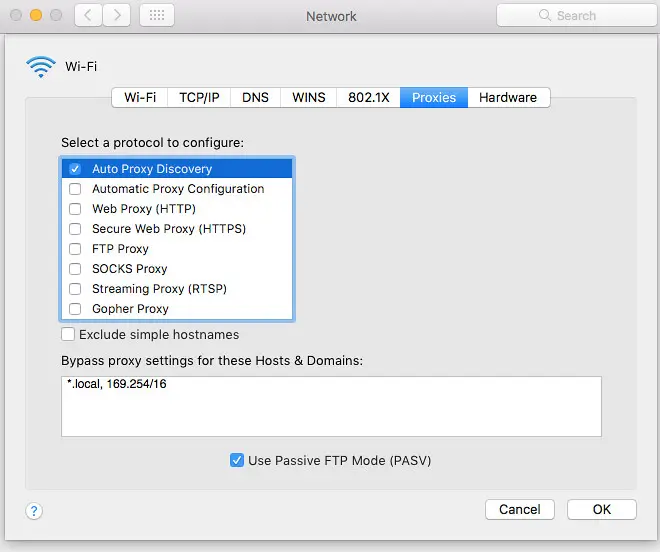
Safari pulls its network preferences from the OS's settings so a screen with the advanced network configuration will pop up.
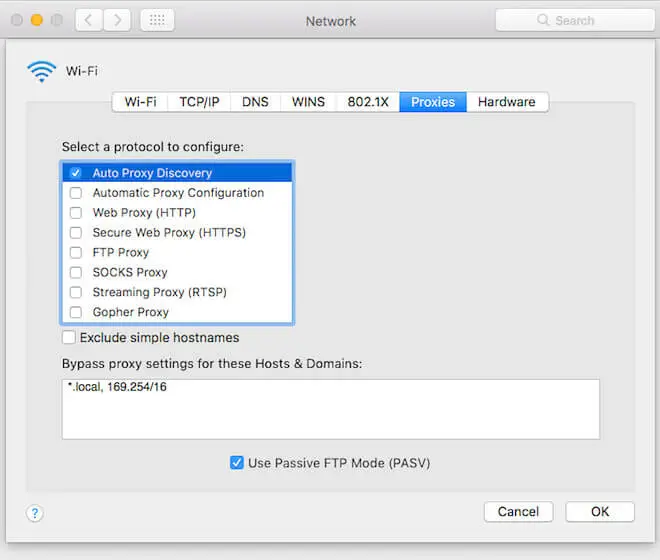
Check the Web Proxy (HTTP) box and it will show you some fields on the right where you can add the proxy credentials.

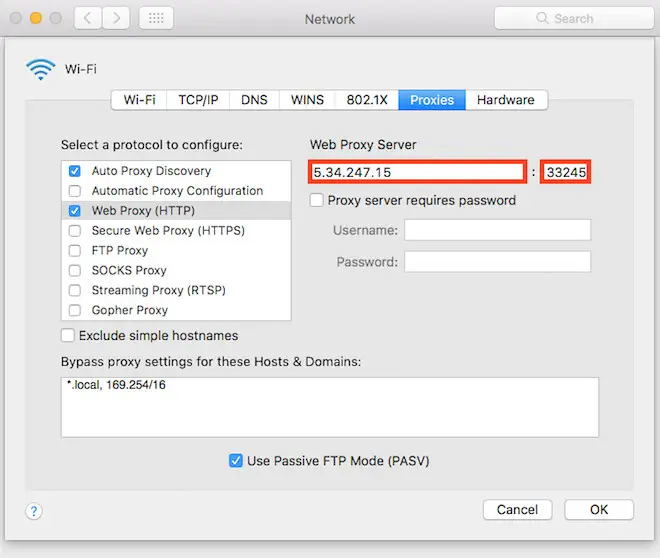
Fill in your private proxy IP and port in the Web Proxy Server field.
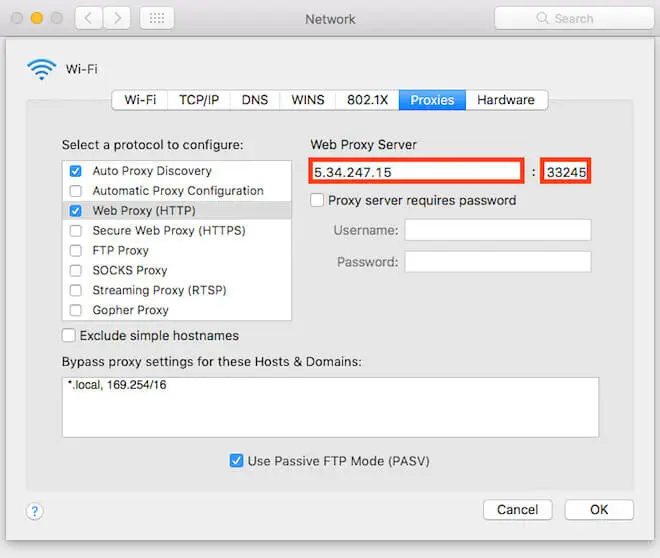
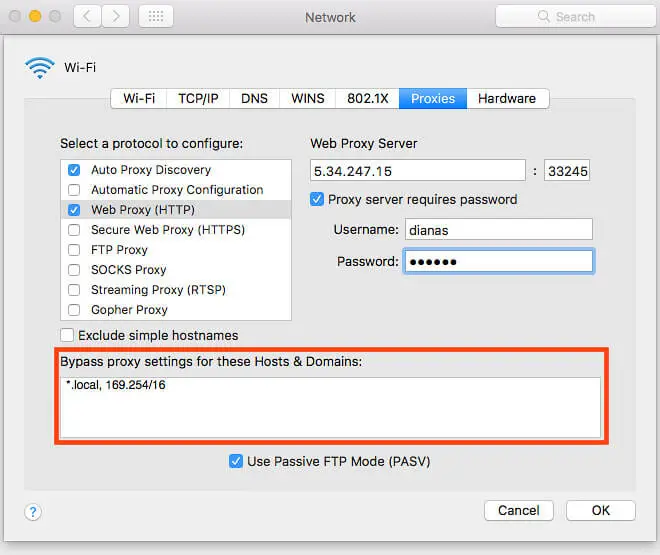
Enable Proxy server requires password and fill in the username and password you got from your account.
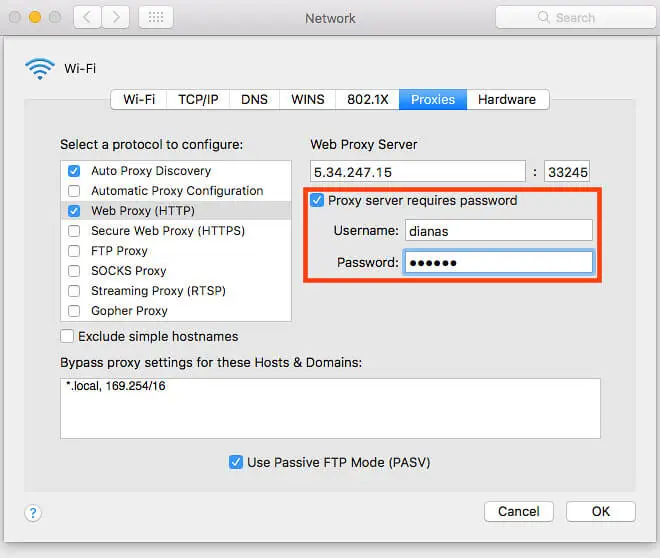
If you have websites you don't want to use the private proxy servers on, you can add them in the Bypass proxy settings field (as shown below). By default, your local networks won't be accessed through private proxies. You can change this by deleting the domains from the field.

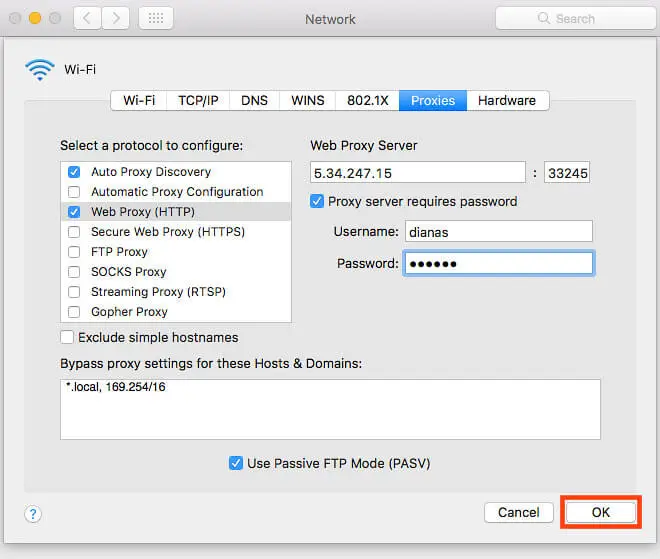
Once you're done with filling in all the fields, click OK.
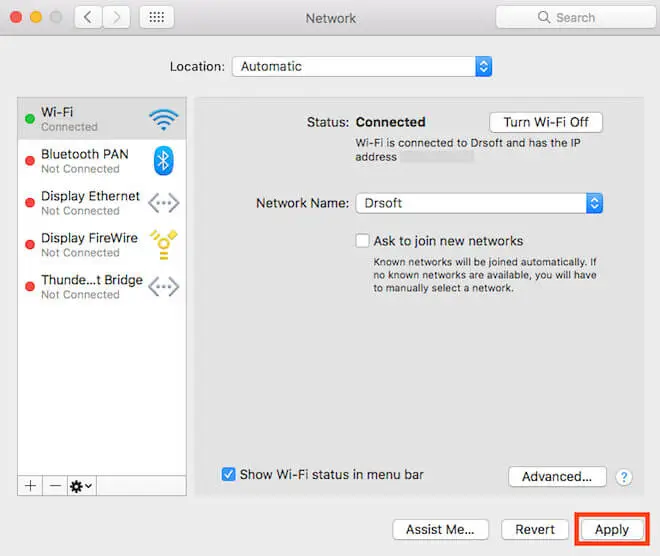
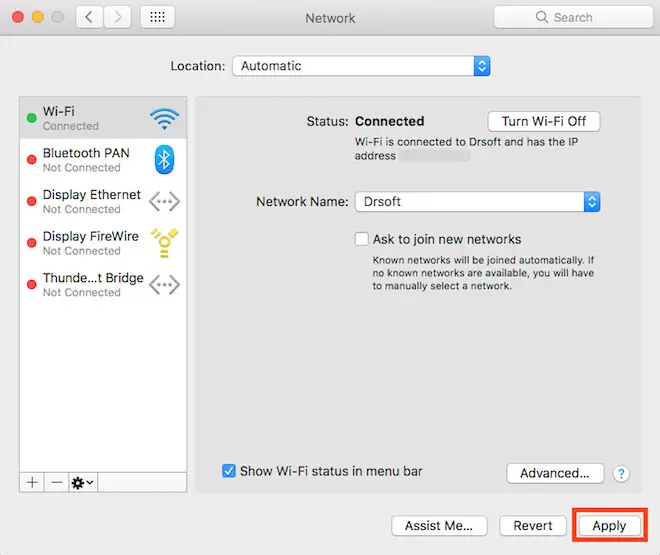
You'll be taken to the main Network settings window. Click Apply for the changes to take place.
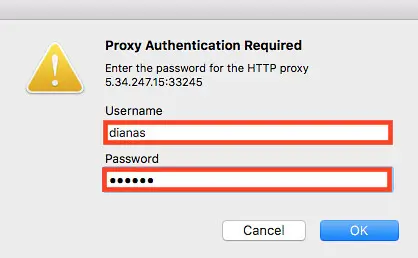
You'll be asked to provide the username and password to authenticate to the proxy server when you'll access a web page. Fill in the Proxy Credentials from your account.
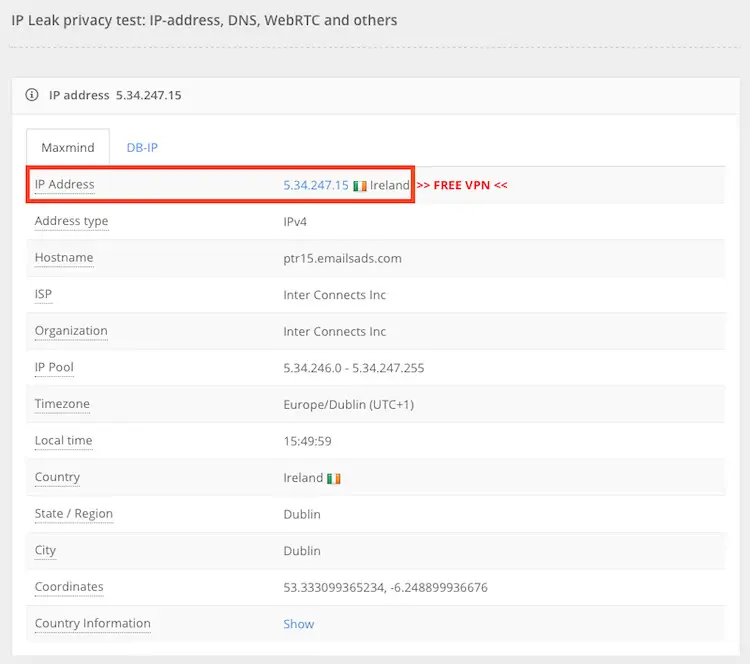
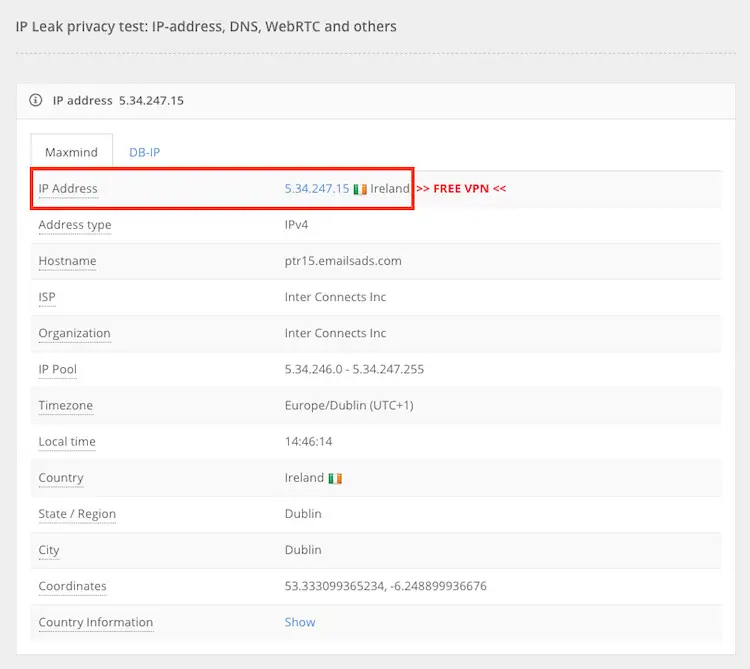
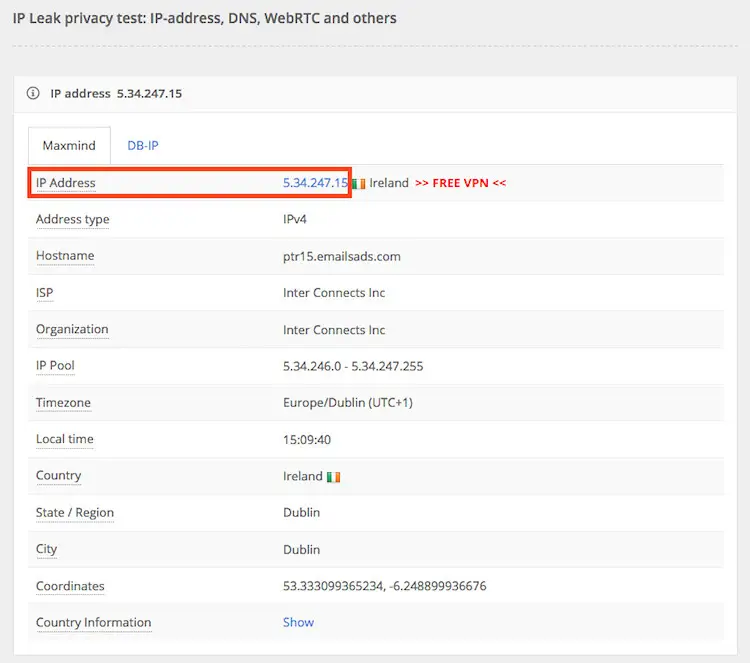
To see if the browser runs on the proxy service, go to IP leak and it'll show you which IP is being used.
*Mind that if you change the settings for Safari and you also have Google Chrome, Internet Explorer, or Microsoft Edge installed, the change will take place on all browsers.
Google Chrome
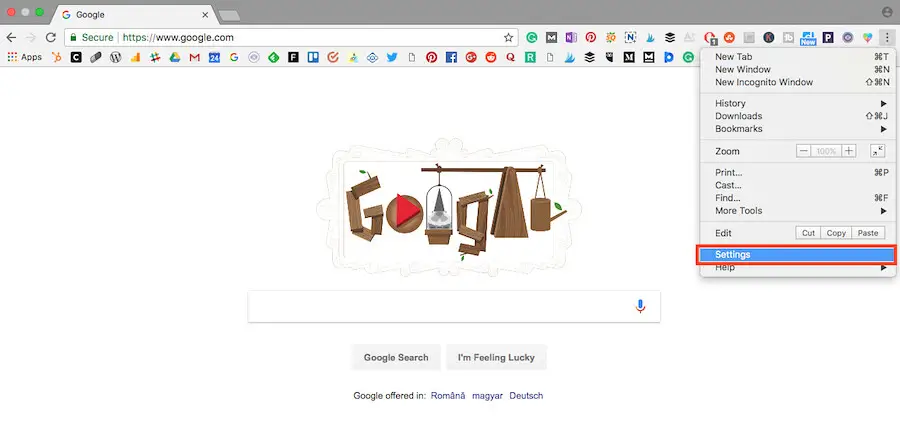
To configure the private proxy in Google Chrome, you first need to enter the Settings by clicking on the drop-down menu in the upper right corner.
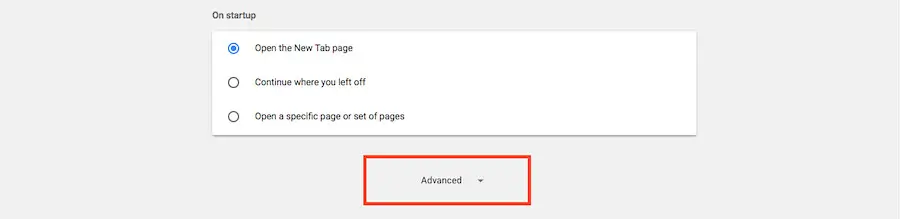
Scroll down until you see Advanced and click on it to see more options.
Scroll to the bottom of the page where you'll find Open proxy settings.
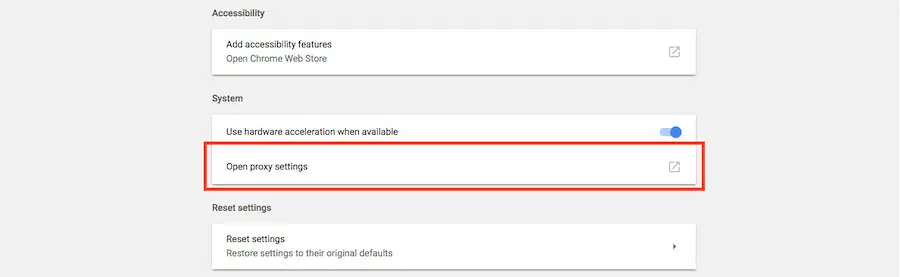
After you click to open the proxy settings, a window with your advanced network connections settings will pop up. Chrome gets its network preferences from the system's settings so here's where you're going to customize your proxy server.
Check the Web Proxy (HTTP) field.

New options will appear on the right. Here is where you add your private proxy address and port number.
Check the box next to the Proxy server requires password and fill in the username and password (the Private Proxy Credentials from your account).

By default, local networks won't be accessed through proxy servers. If you want to change this, delete the inputs in the Bypass proxy settings. Also, if you have certain websites where you don't want to use private proxies, add them in the field separated by commas.
Once you added all the credentials, click OK.

You'll be taken to the main network settings window where you have to click Apply to finish the private proxy configuration in Chrome.
When you'll access a web page, you'll be asked to fill in the username and password so you authenticate to the private proxy server (The Proxy Credentials from your account).
To see if the changes successfully took place, go to IPleak and it will show you the IP you're connected with.
*Mind that if you change the settings for Google Chrome and you also have Safari, Internet Explorer, or Microsoft Edge installed, the change will take place on all browsers.
Mozilla Firefox
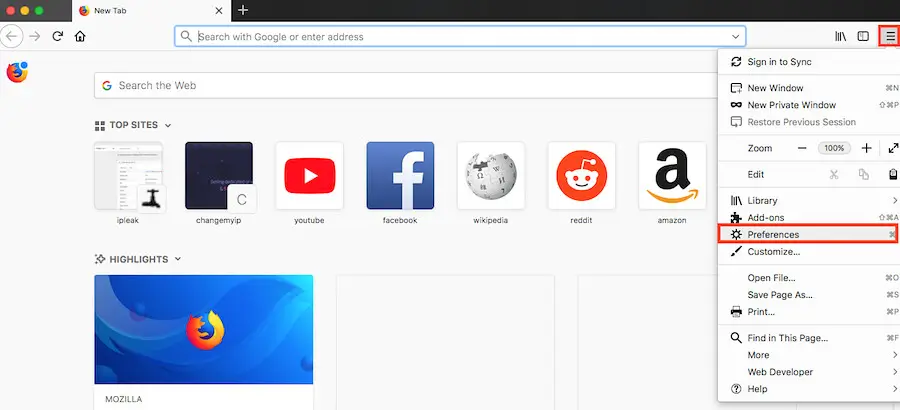
To configure the proxies in Mozilla Firefox first open up the browser and click on Preferences from the drop-down menu in the upper right corner.
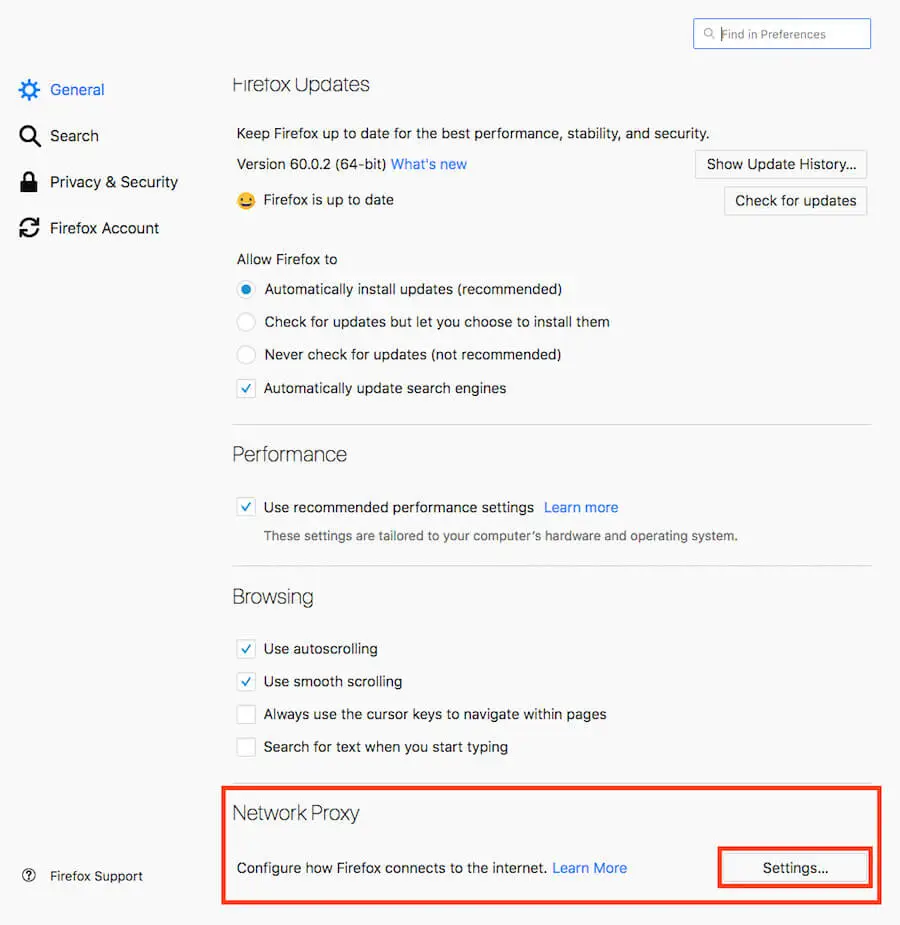
Scroll down to the bottom of the page where you'll find Network Proxy. Click on Settings.
A new window with the proxy settings will open.
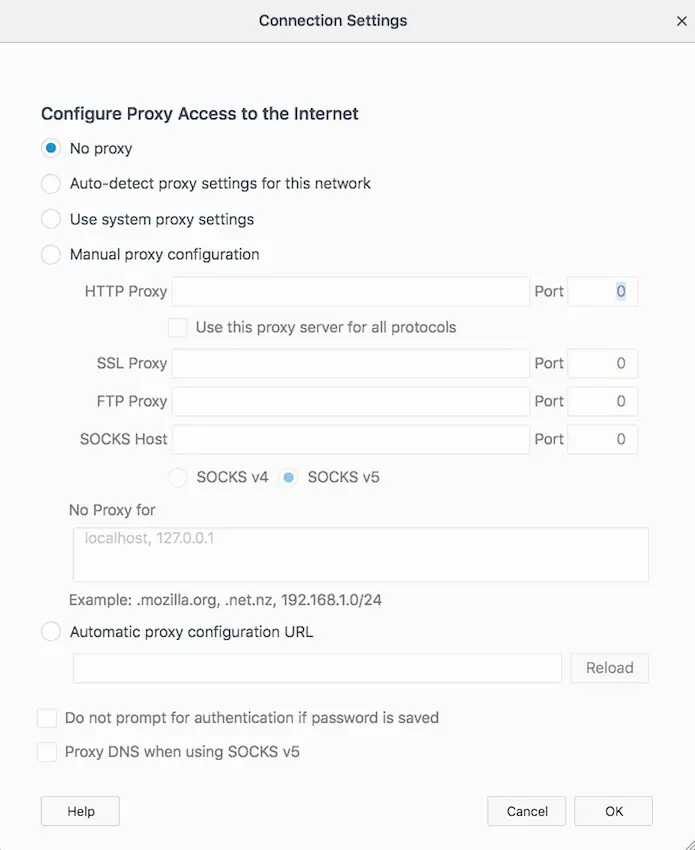
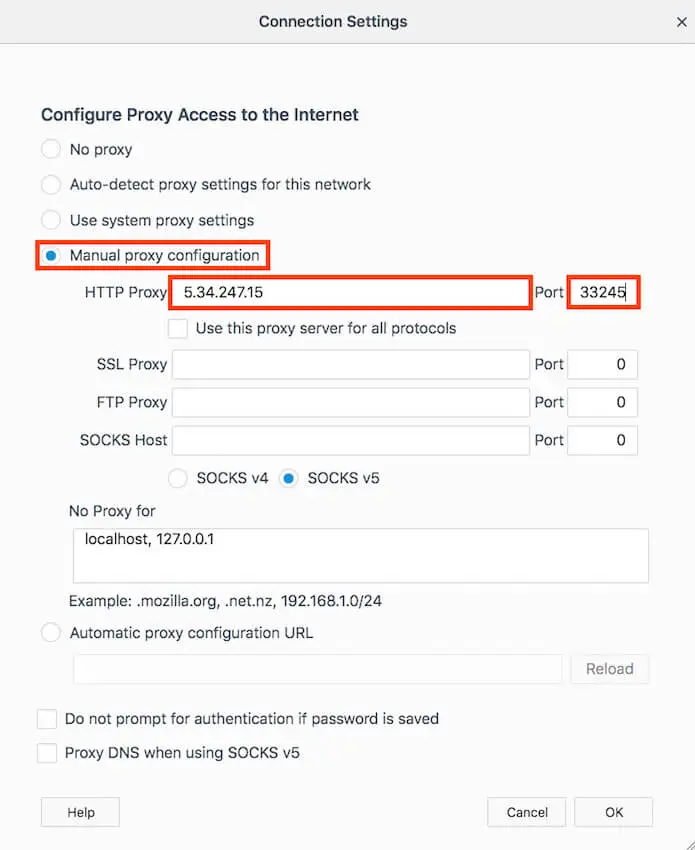
Click on the radio button next to Manual proxy configuration and add your private proxy address and port in the HTTP Proxy field.
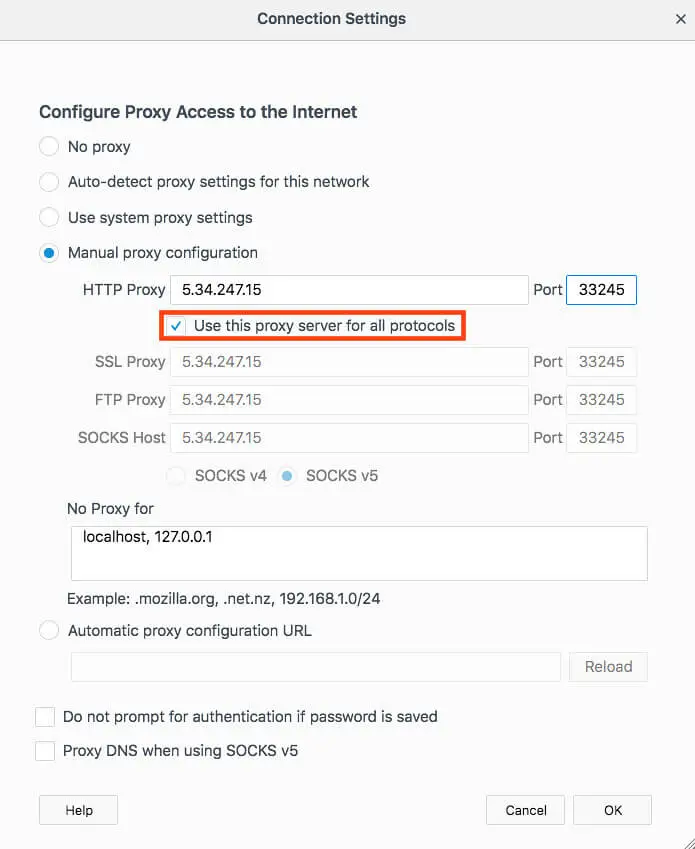
Enable Use this proxy server for all protocols. You'll see that all the fields below will fill in automatically.
You can add which websites not to use the proxy servers in the No Proxy for field. By default, it's configured not to use private proxy servers on local networks. If you want to add more options, paste the addresses in the field separated by commas.
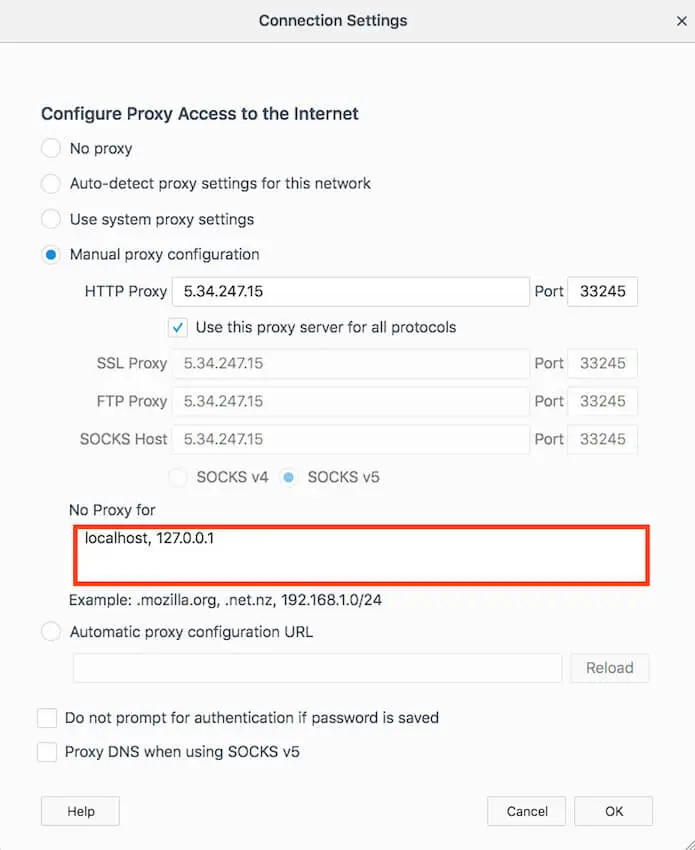
Once you're done filling in the fields, click OK. When you'll access a web page, you'll be asked to provide the username and password to authenticate to the private proxy server (the Proxy Credentials you take from your account).
Head over to IPleak to see if the IP matches your private proxy server.
Microsoft Edge
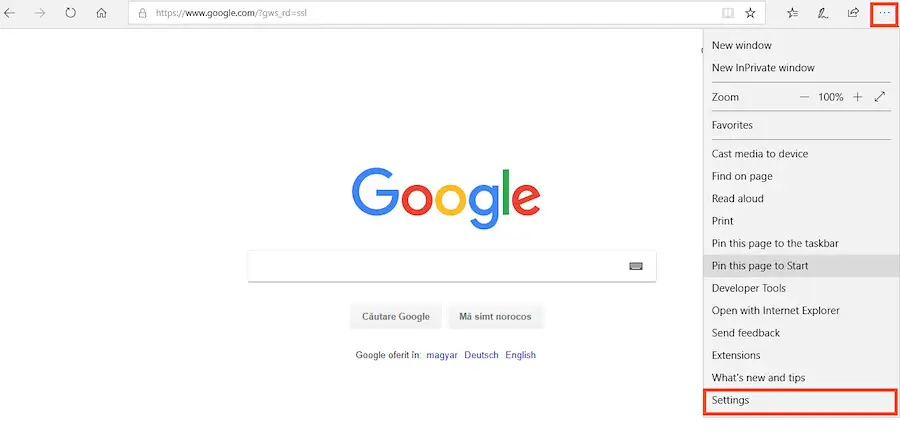
To configure proxies in Microsoft Edge, open the browser and click on the hamburger button in the upper right corner to reveal the menu. Click on Settings.
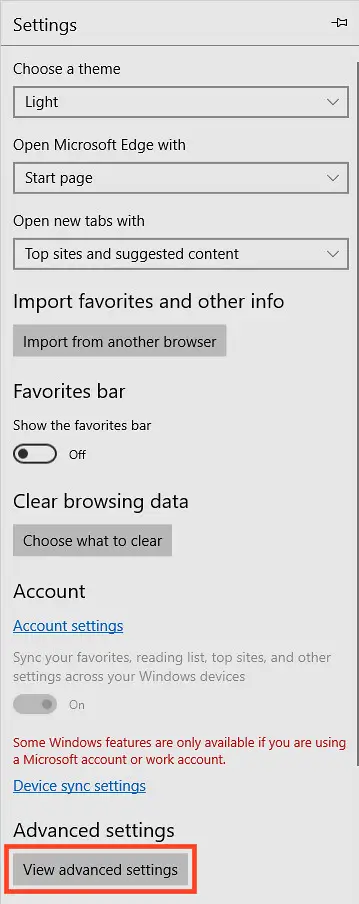
The settings window will open. Scroll down until you see Advanced settings and click on View advanced settings.
Here you'll see a section named Proxy setup. Click on Open proxy settings.

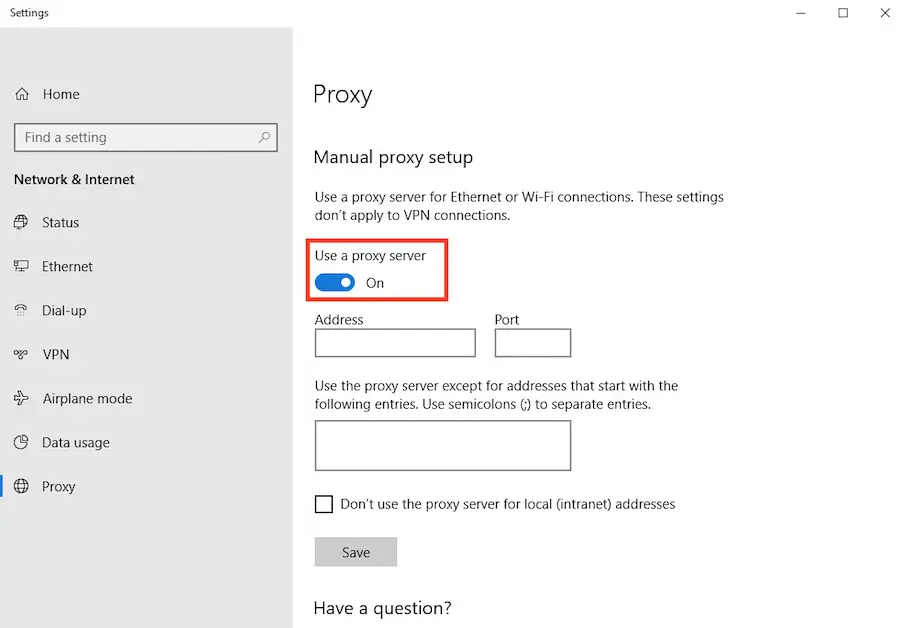
A new window will pop up where you can customize your proxy settings. Scroll down to the Manual proxy setup and turn on Use a proxy server.
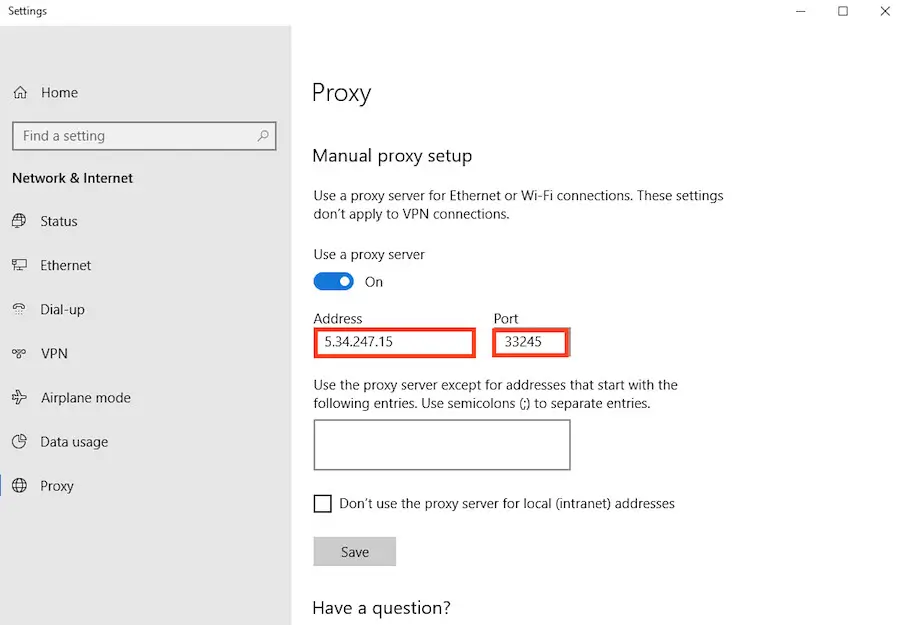
Fill in your proxy IP and port.
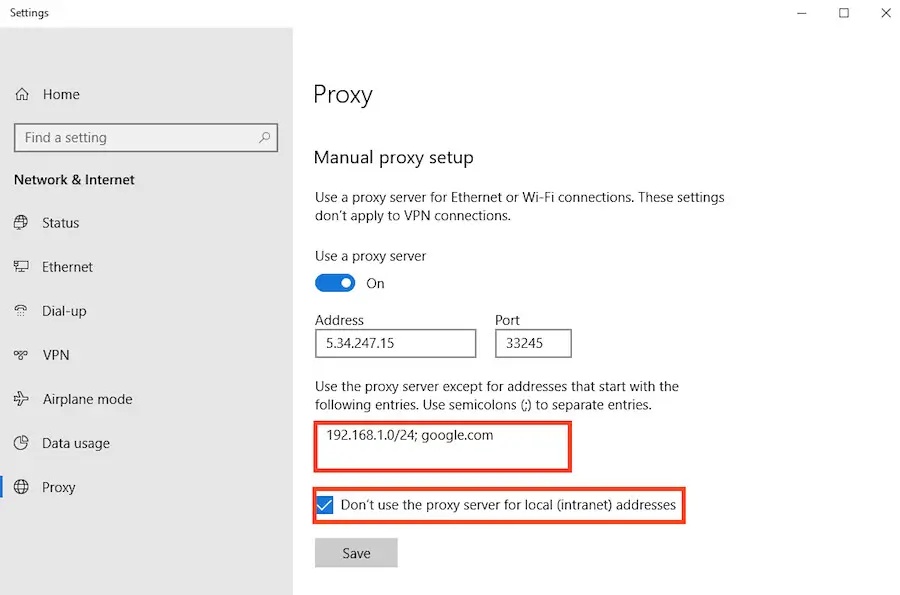
If you have certain websites where you don't want to connect through proxy servers, you can add them in the dedicated box separated by semicolons (as shown below). You can also choose not to use proxy servers on local addresses by checking the box shown bellow.
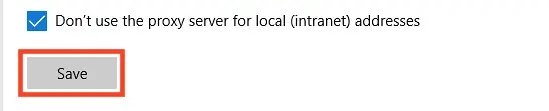
Once you're done with filling in your proxy credentials and the desired settings, click on Save.
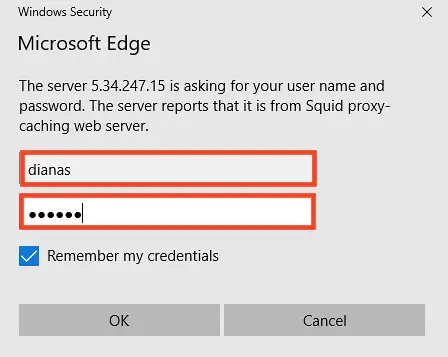
You'll be asked to provide the username and password to authenticate to the proxy server when you'll be accessing a web page for the first time. Fill in the Proxy Credentials from your account.
Head over to the IP leak to see if the IP matches your proxy's address.
*Mind that if you also have Google Chrome, Safari, or Internet Explorer installed, the change will take place overall.
You may also be interested in:
1. Configure Your Browser for HTTP Proxies on Windows: A Step-by-Step Guide
2. How do I configure browsers to use the SOCKS5 Proxies on Windows