WireGuard VPN is a cutting-edge virtual private network solution that offers fast and secure internet connectivity. If you're using a Windows device, this tutorial will guide you through the process of setting up WireGuard VPN and how to use it to enhance your online privacy and security. By following the steps outlined in this tutorial, you'll be able to create a secure connection between your device and the internet, encrypting your online traffic and hiding your IP address. Whether you're a business professional or just someone looking to protect your online identity, WireGuard VPN is a great option for Windows users.
1. First install the Wireguard App according to your system, you can find it here
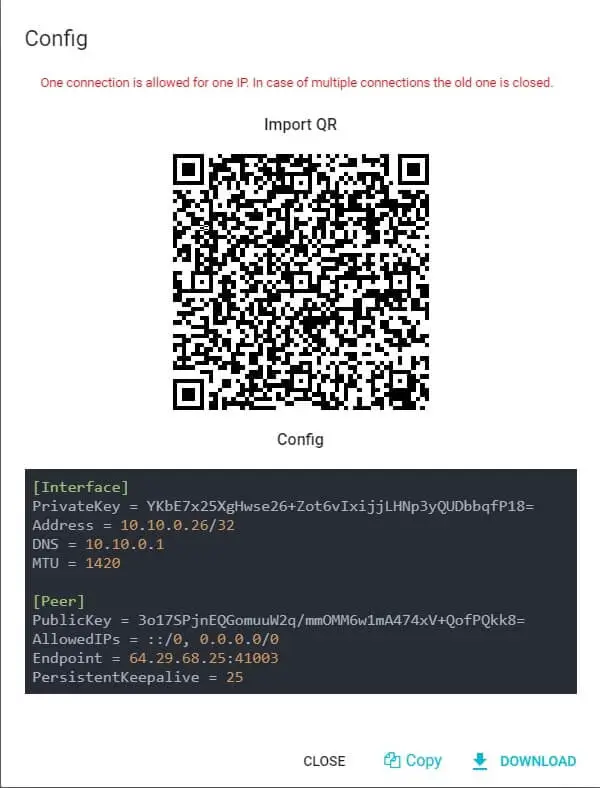
2. Go to your purchased Wireguard IPs from us, at the end of the row you have a 3 dots option menu, press it, and select Config.

3. Here you will see your configuration.
In the first part, you have the QR code of the configuration, for mobile apps, you can scan it to easily add it
In the second part you will see the text of the configuration, which you can:
- Download the .conf file.
- Copy the configuration text, and save it on your device in a file with the .conf extension

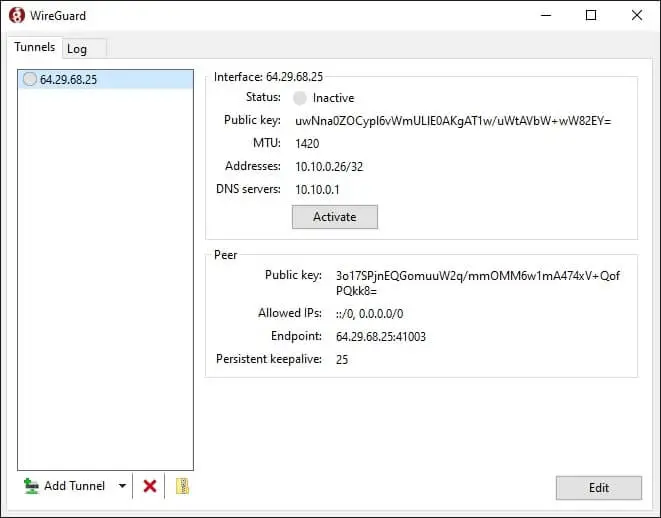
4. Open the Wireguard app and in the bottom left corner press on Add Tunnel. After that select the tunnel configuration from step 3

5. Select the imported tunnel from the left side.

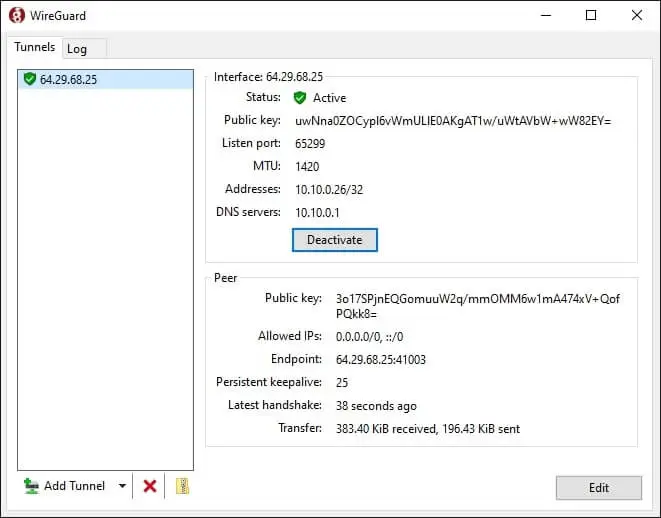
6. Click on Activate in order tunnel all your traffic through the Wireguard VPN

In conclusion, setting up WireGuard VPN on your Windows device is a simple and straightforward process that offers numerous benefits. With WireGuard VPN, you can enjoy fast and secure internet connectivity, protect your online privacy, and encrypt your online traffic. Whether you're a business professional or just someone looking to protect your online identity, using WireGuard VPN on your Windows device is a smart choice that will ensure you stay safe and secure online. By following the steps outlined in this tutorial, you'll be able to take full advantage of the many benefits that WireGuard VPN has to offer.
Related tutorials:
1. Step-by-Step Guide to Setting Up WireGuard VPN on macOS
2. Step-by-Step Guide to Setting Up WireGuard VPN on Android
3. Step-by-Step Guide to Setting Up WireGuard VPN on IOS
